

Last weekend, I wanted to do a fun craft with my son. Daddy was busy building the chicken coop, and I needed something to keep us busy…and sitting for just a bit. Since 4th of July was right around the corner, I thought it would be fun to create a little banner that we could hang outside. Mind you, our banner was done with my son. My son loves paint (they always love paint) and therefore it definitely looks home-made…by my kid. You could, of course, get all Martha Stewart and do it by your creative self making it look slightly less kid-like. Here’s what we did and how we did it:
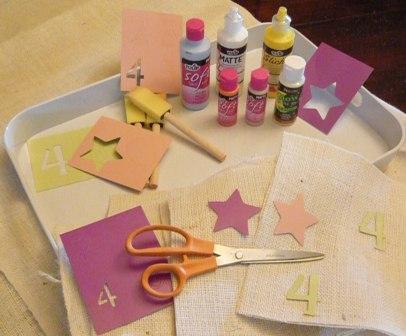
1. Gather your supplies. We just used whatever we had around the house – muslin, fabric paint, acrylic paint, foam fabric brushes, some stencils. And, some cardboard to lay down under the muslin. This is a very important step – you don’t want paint all over your table.
-

- Gather Your Supplies
-

- Get your fabric and lay it out – we used muslin

-

- Cut fabric into shapes you desire

-

- Lay out stencils

-
- Start Painting

-

- Be creative


-

- Check it out. Decide on next design

-

- Check on child who is painting cardboard not fabric

-

- Tell him what a great job he’s doing

-

- Hang fabric pieces to dry on window

-

- windows

-

- String banner with twine

-

- Make sure it’s in order you want

-

- Hang outside for all to see


-

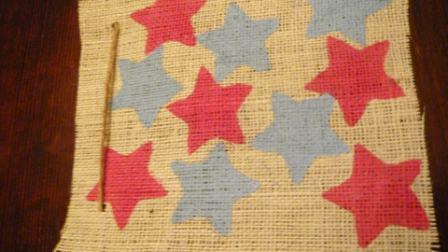
- Check out close-up

-

- and more close-ups
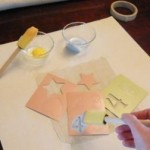
3. Tape the muslin down to the cardboard and lay out your design with stencils, then start painting – just dab dab dabbing. Remove stencils carefully and peruse your design.
4. Tape muslin square onto a window to dry – it’s just an easy thing to do and keeps it out of the way;) Move on to your next design. You’ll get better and more creative as you go along.
5. Check in on child to see how he/she is doing. Notice that he’s painting everything except the fabric. Tell him what a great job he’s doing. Share stencils with child and try not to hover over him, just let him do whatever creative thing he wants to do.
6. When all squares are complete and dry, lay them out on a long table or the floor to see the order you want. Stack ’em up in that order. Then punch holes in each top corner. Now, remember, we used muslin. Any holes in muslin will start to fray really quickly, so be careful when stringing the twine through the holes.
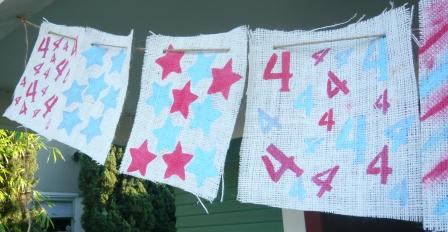
7. Now, CAREFULLY (if using muslin) string your twine through the holes making sure to leave a lot of twine on the end with which to hang said banner. I made little loops on the ends of mine so I could easily just loop it on the nails that are already in my porch for Christmas lights.
8. Take your banner to your hanging spot and hang it. You will probably need to adjust them a bit unless you made a knot after each fabric square, but that’s way too much work for us. Stand back and peruse your handi-work. Whallah, fun project for you and the kids.
You can use this to hang above your bbq table on 4th of July, on a fence, or on your porch to welcome your guests. Have fun crafting!


